Tuesday, March 5, 2013
Saturday, December 22, 2012
Tuesday, May 1, 2012
Tutorial On Felt Hair Flower

Today we are going to make a hair flower! Doesn't it look lovely?……
You will need felt (two colors)
scissors
a button (for the center)
Hot glue gun
Hair clip (optional)


Enjoy!
Saturday, March 10, 2012
Tutorial On Nail Art


I chose the colors yellow, pink, and blue….


 Paint your nails one solid color. Choose a lighter color for this step because we will be applying nail polish on top.
 Now wait 10 minutes or so until your nails dry….
Then tape off a section of your nail…. Like in pic above.


WOW!!!!!! Don't they look fantastic!????? I love the way mine turned out. Just remember to let them dry in between really good. Otherwise you will take your nail polish off once you go to tape it. :)
Make sure you try different color combinations!!!!!!!!!! :D
Have FUN!
Friday, February 17, 2012
Tutorial On Lace T-Shirt

I made this about 6 months ago, but am just getting around to posting it! :) To make this shirt, you will need:
~ A plain t-shirt (any color)
~ Scissors
~ Lace
~ Pins
~ Sewing machine
~Thats it!
On to the tutorial….


Once again, Make sure you only sew the lace to the front of the shirt!!!! Not the front and back...

Trace around the neckline and cut around it...


Tuesday, January 31, 2012
Nothing Else to Post...

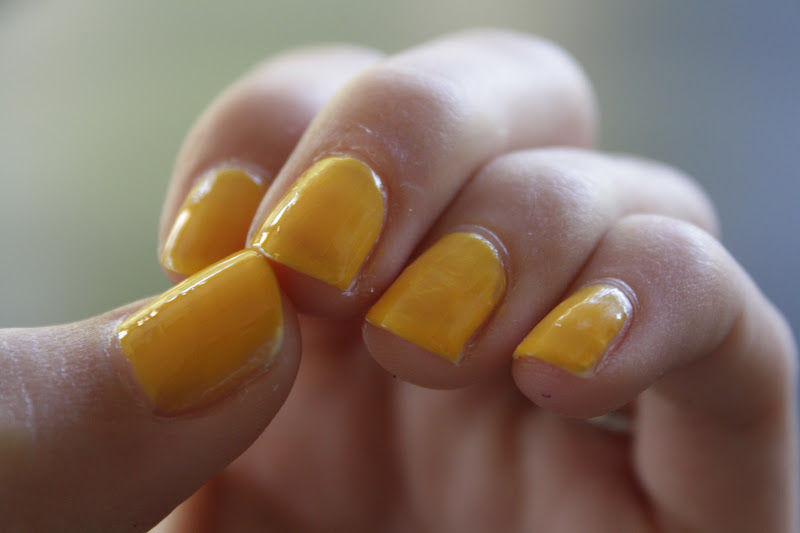
~Well, this my dear readers would be a…. "I have nothing else to post" post. I really need to make something. :) And it's not that I haven't made anything! I just have to take pictures of everything and then upload them….. SO much work!!!! :) Just kidding. It's rather easy. So for now at least, you get an extra-large picture of my nails which I water marbled.
~ I first had to tape around my nails with normal tape. Then, in a glass of water you drop in nail polish. All colors. Mine were purple, blue, green and white. Soon after the nail polish is put in the water, (as soon as you can) swirl the colors with a toothpick. Now dip your nail inside this… It's a bit tricky and you might have to practice this a few times. Once you have successfully dipped you nail in, take it out and then take off the tape. Clean up the edges and you are done!!!!! This was my first time ever doing it so I kind of messed up. :P
~ And that is all until next time. Once again I don't have any pictures for this lonely post….. A post without pictures, how sad. :((( At least I have an extra-large picture of my hand??????
:)
Saturday, November 5, 2011
Headband Part 3
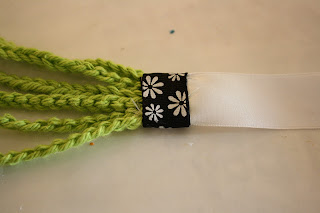
Ok… the third and final chapter of this amazing headband!!! The only other thing you will need is 2 18" pieces of ribbon, (the white) and 2…. 4" pieces of ribbon. :) Oh… and a glue gun!
To see the other parts of this tutorial, go here, here, and here. :)

Now take all of your end yarn pieces and lay them out so none of them are overlapping each other.

Now take your glue gun and glue the ends together!!!


Then snip the ends to make a clean cut… just make sure all the ends stay glued...

I also glued this part… where my finger is, to keep it from gapping.

SEE??? Much better. :)


Wrap this ribbon around gluing as you go...
Do this to both ends…. and…..
 YAY!!! :D you are finished….

TADA!!!! It looks sooooo good. (and even better on.) :)
To see the other parts of this tutorial, go here, here, and here. :)

Now take all of your end yarn pieces and lay them out so none of them are overlapping each other.

Now take your glue gun and glue the ends together!!!

Keep on gluing until all your ends are glued together. :)

Then snip the ends to make a clean cut… just make sure all the ends stay glued...

I also glued this part… where my finger is, to keep it from gapping.

SEE??? Much better. :)


Wrap this ribbon around gluing as you go...

Do this to both ends…. and…..


TADA!!!! It looks sooooo good. (and even better on.) :)
Subscribe to:
Posts (Atom)